Install Nginx, MySQL, PHP LEMP Stack on Debian 8

Update, upgrade Debian and install Nginx

#sudo apt-get update && sudo apt-get dist-upgrade
#sudo apt-get install nginx

Configure UFW firewall to allow Nginx services

#sudo apt-get install ufw
#sudo ufw enable
#sudo ufw allow 'Nginx HTTP'
#sudo ufw allow ssh
#sudo ufw status

You should see allowed services (Nginx, SSH, etc) in the displayed output:

Output
Status: active
To Action From
-- ------ ----
OpenSSH ALLOW Anywhere
Nginx HTTP ALLOW Anywhere
OpenSSH (v6) ALLOW Anywhere (v6)
Nginx HTTP (v6) ALLOW Anywhere (v6)

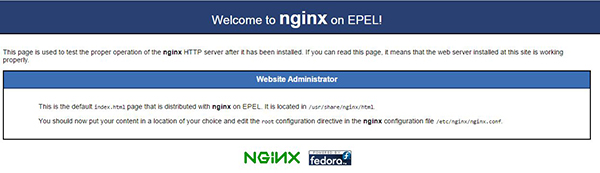
Test the Nginx web server on browser http://server_domain_or_IP

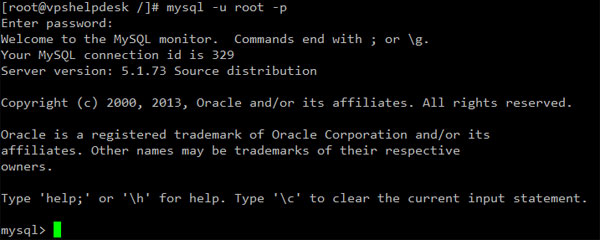
Install MySQL , Follow the instructions, choose Y

#sudo apt-get install mysql-server
#sudo mysql_secure_installation

Install PHP for Processing

Since Nginx does not contain native PHP processing like some other web servers, we will need to install fpm, which stands for “fastCGI process manager”. We will tell Nginx to pass PHP requests to this software for processing.  Open /etc/apt/sources.list in your text editor:

#sudo vim/etc/apt/sources.list

Append the contrib and non-free repositories at /etc/apt/sources.list

deb http://cloudfront.debian.net/debian jessie main contrib non-free
deb http://security.debian.org/ jessie/updates main contrib non-free
deb http://cloudfront.debian.net/debian jessie-updates main contrib non-free
#sudo apt-get update
#sudo apt-get install php5-fpm php5-mysql

** Choose additional PHP Extension to install as follows

#apt-get -y install php5-mysqlnd php5-curl php5-gd php5-intl php-pear php5-imagick php5-imap php5-mcrypt php5-memcache php5-intl php5-pspell php5-recode php5-snmp php5-sqlite php5-tidy php5-xmlrpc php5-xsl

Secure PHP components

#sudo vim /etc/php5/fpm/php.ini

Uncomment cgi.fix_pathinfo and change conditions to “0”

cgi.fix_pathinfo=0

Restart our PHP processor by typing:

#sudo systemctl restart php5-fpm
#/etc/init.d/php5-fpm restart

Configure Nginx to Use the PHP Processor

Open the default Nginx server block configuration file by typing:

#sudo vim /etc/nginx/sites-available/default

Currently, with the comments removed, the Nginx default server block file looks like this:

server {
    listen 80 default_server;
    listen [::]:80 default_server;

    root /var/www/html;
    index index.html index.htm index.nginx-debian.html;

    server_name _;

    location / {
        try_files $uri $uri/ =404;
    }
}

We need to make some changes to this file for our site.

  • First, we need to add index.php as the first value of our index directive so that files named index.php are served, if available, when a directory is requested.
  • We can modify the server_name directive to point to our server’s domain name or public IP address.
  • For the actual PHP processing, we just need to uncomment a segment of the file that handles PHP requests. This will be the location ~\.php$ location block, the included fastcgi-php.confsnippet, and the socket associated with php-fpm.
  • We will also uncomment the location block dealing with .htaccess files. Nginx doesn’t process these files. If any of these files happen to find their way into the document root, they should not be served to visitors.
server {
    listen 80 default_server;
    listen [::]:80 default_server;

    root /var/www/html;
    index index.php index.html index.htm index.nginx-debian.html;

    server_name your_server_ip;

    location / {
        try_files $uri $uri/ =404;
    }

    location ~ \.php$ {
        include snippets/fastcgi-php.conf;
        fastcgi_pass unix:/var/run/php5-fpm.sock;
    }

    location ~ /\.ht {
        deny all;
    }
}

Test your configuration file for syntax errors by typing:

#sudo nginx -t
nginx: the configuration file /etc/nginx/nginx.conf syntax is ok
nginx: configuration file /etc/nginx/nginx.conf test is successful

If any errors are reported, go back and recheck your file before continuing.

When ready, reload Nginx to make the necessary changes:

#sudo systemctl reload nginx

Create a PHP File phpinfo() to Test Configuration

#vim /var/www/html/info.php

Open at browser http://server_domain_or_IP/info.php

Enable gzip compression Apache Nginx for faster web speed

Gzip compression helps to reduce the size of transmitted data on Apache Nginx server

There are 2 ways to Enable gzip compression on Apache, with httpd configuration and htaccess

Enable gzip compression n Apache with httpd configuration

By default mod_deflate.so module has been active but we want to make sure and check if mod_deflate.so module has been installed and activate at httpd configuration.

#cat /etc/httpd/conf/httpd.conf | grep deflate
LoadModule deflate_module modules/mod_deflate.so

** If it is commented (#), please remove it (#) out.

Next part is add code below to httpd.conf, these lines can store at the end of the file:

#Enable gzip compression
<ifModule mod_headers.c>
SetOutputFilter DEFLATE
# You can't compress what is already compressed
SetEnvIfNoCase Request_URI \.(?:gif|jpe?g|png)$ no-gzip dont-vary
SetEnvIfNoCase Request_URI \.(?:exe|t?gz|zip|bz2|sit|rar)$ no-gzip dont-vary

#Make proxies work as they should.
<ifModule mod_headers.c>
Header append Vary User-Agent
</ifModule>
</ifModule>

Restart Apache to effect the changes

#service httpd restart

Enable gzip compression on Apache with .htaccess by add configuration line below to .htaccess

#Enable gzip compression
<ifModule mod_headers.c>
# Compress HTML, CSS, JavaScript, Text, XML and fonts
AddOutputFilterByType DEFLATE application/javascript
AddOutputFilterByType DEFLATE application/rss+xml
AddOutputFilterByType DEFLATE application/vnd.ms-fontobject
AddOutputFilterByType DEFLATE application/x-font
AddOutputFilterByType DEFLATE application/x-font-opentype
AddOutputFilterByType DEFLATE application/x-font-otf
AddOutputFilterByType DEFLATE application/x-font-truetype
AddOutputFilterByType DEFLATE application/x-font-ttf
AddOutputFilterByType DEFLATE application/x-javascript
AddOutputFilterByType DEFLATE application/xhtml+xml
AddOutputFilterByType DEFLATE application/xml
AddOutputFilterByType DEFLATE font/opentype
AddOutputFilterByType DEFLATE font/otf
AddOutputFilterByType DEFLATE font/ttf
AddOutputFilterByType DEFLATE image/svg+xml
AddOutputFilterByType DEFLATE image/x-icon
AddOutputFilterByType DEFLATE text/css
AddOutputFilterByType DEFLATE text/html
AddOutputFilterByType DEFLATE text/javascript
AddOutputFilterByType DEFLATE text/plain
AddOutputFilterByType DEFLATE text/xml

#Remove browser bugs (only needed for really old browsers)
BrowserMatch ^Mozilla/4 gzip-only-text/html
BrowserMatch ^Mozilla/4\.0[678] no-gzip
BrowserMatch \bMSIE !no-gzip !gzip-only-text/html
Header append Vary User-Agent
</ifModule>

Enable gzip compression on Nginx by activate gzip on and add some configuration to etc/nginx/nginx.conf

#vi /etc/nginx/nginx.conf

Add this line below to etc/nginx/nginx.conf

#Enable gzip compression
gzip on;
gzip_comp_level 2;
gzip_min_length 1000;
gzip_proxied expired no-cache no-store private auth;
gzip_types text/plain application/x-javascript text/xml text/css application/xml;


Enable Keep Alive for faster web speed Apache and Nginx

There are 2 ways to enable Keep Alive On at Apache server, with .htaccess and httpd.conf

Enable keep-alive On at Apache with httpd.conf

Keep Alive Default configuration is Off, we must change it to On

vi /etc/httpd/conf/httpd.conf

Find KeepAlive sentence and edit Off to On

.....................................
# KeepAlive: Whether or not to allow persistent connections (more than
# one request per connection). Set to "Off" to deactivate.
#
# KeepAlive Off
KeepAlive On
......................................

Restart Apache to effect the changes

#vi service httpd restart

Enable keep-alive on Apache server with .htaccess

This is alternative if we do not have access to server. Add code below to .htaccess

<ifModule mod_headers.c>
Header set Connection keep-alive
</ifModule>

Enable keep-alive On Nginx with nginx.conf

By default NGINX supports keep-alive, add this line below to nginx configuration

#vi etc/nginx/nginx.conf
# Keep Alive
keepalive_timeout 65;
keepalive_requests 100000;
sendfile on;
tcp_nopush on;
tcp_nodelay on;

Install WordPress on Nginx CentOS Server

Before to install Wordpress online on Nginx CentOS Server, we should verify that NGINX MySQL PHP (LEMP) has been installed and all of the LEMP services are started and running.

The most important thing is Nginx WordPress configuration for domain.tld. Assume domain.ltd has been configured as virtual host on our server, edit virtual.conf and insert configuration below:

#vi /etc/nginx/conf.d/virtual.conf
# Upstream to abstract backend connection(s) for php
upstream php {
server unix:/tmp/php-cgi.socket;
server 127.0.0.1:9000;
}

server {
listen 80;
## Your website name goes here (servername example.com www.example.com).
server_name domain.tld;
## Your only path reference.
root /var/www/example.com/public_html;
## This should be in your http block and if it is, it's not needed here.
index index.php;

location = /favicon.ico {
log_not_found off;
access_log off;
}

location = /robots.txt {
allow all;
log_not_found off;
access_log off;
}

location / {
# This is cool because no php is touched for static content.
# include the "?$args" part so non-default permalinks doesn't break when using query string
try_files $uri $uri/ /index.php?$args;
}

location ~ \.php$ {
#NOTE: You should have "cgi.fix_pathinfo = 0;" in php.ini
include fastcgi.conf;
fastcgi_intercept_errors on;
fastcgi_pass php;
}

location ~* \.(js|css|png|jpg|jpeg|gif|ico)$ {
expires max;
log_not_found off;
}
#Fix Yoast SEO Sitemaps
rewrite ^/sitemap_index\.xml$ /index.php?sitemap=1 last;
rewrite ^/([^/]+?)-sitemap([0-9]+)?\.xml$ /index.php?sitemap=$1&sitemap_n=$2 last;
}

Save and Exit then Restart nginx and php-fpm service again so that all of the changes take effect:

#service nginx restart
#service php-fpm restart

Step one: Download WordPress directly from their website.

Make sure current directory is /var/www/example.com/public_html

#cd /var/www/example.com/public_html
#wget http://wordpress.org/latest.tar.gz

Unzip it the the next line:

#tar -xzvf latest.tar.gz

After we unzip the wordpress files, they will be in a directory called wordpress in the current directory.
Copy all files and folder on that wordpress directory to /var/www/example.com/public_html

#cp -R wordpress/* /var/www/example.com/public_html

We will need to create an /upload directory on /var/www/wp-content/ folder so we can make contents and upload files into it.

#mkdir -p /var/www/wp-content/uploads

Grant Ownership Permissions of directory to user

#chown -R user:nginx /var/www/example.com/public_html

Step Two: Create the WordPress Database and User.

#mysql -u root -p
mysql>CREATE DATABASE wpdb;
Query OK, 1 row affected (0.00 sec)

Then we need to create the new user. You can replace the database, name, and password

mysql>CREATE USER 'wpuser'@'localhost' IDENTIFIED BY 'password';
Query OK, 0 rows affected (0.00 sec)

Finish up by granting all privileges to the new user.

mysql>GRANT ALL PRIVILEGES ON wpdb.* TO 'wpuser'@'%' WITH GRANT OPTION;
Query OK, 0 rows affected (0.00 sec)

Then refresh MySQL:

mysql>FLUSH PRIVILEGES;
Query OK, 0 rows affected (0.00 sec)

Exit out of the MySQL shell:

exit

Step Three Setup the WordPress Configuration
The first step to is to copy the sample wordpress configuration file (wp-config-sample.php) into a new file wp-config.php which we will edit,  assume current working directory is /var/www/example.com/public_html;

#cd /var/www/example.com/public_html
#cp wp-config-sample.php wp-config.php

Then open the wordpress config:

#vi wp-config.php

Find the section that contains the field below and substitute in the correct name for your database, username, and password:

// ** MySQL settings - You can get this info from your web host ** //
/** The name of the database for WordPress */
define('DB_NAME', 'wpdb');

/** MySQL database username */
define('DB_USER', 'wpuser');

/** MySQL database password */
define('DB_PASSWORD', 'password');
Save and Exit.


From here, WordPress has its own easy to follow installation form online. However, the form does require a specific php module to run. If it is not yet installed on your server, download php-gd:

#yum install php-gd

Restart nginx and php-fpm service again so that all of the changes take effect:

#service httpd restart

Step Five RESULTS Access the WordPress Installation
Access the page by adding /wp-admin/install.php to your site’s domain or IP address (eg. example.com/wp-admin/install.php) and fill out the short online form

Import Export MySQL Dumpfile MySQL Server on Terminal

This is an alternative way to restore or import MySQL Dumpfile data with mysql command on Terminal.
Best tool to restore or import MySQL Dumpfile is phpMyAdmin, here is the tutorial to Set up Apache phpMyadmin and Nginx phpMyAdmin

This is restore or import dbuser.sql dumpfile into dbuser MySQL database using user as username:

First we upload MySQL dumpfile to terminal or home folder of user
Easy simple way by log in via SFTP (SSH File Transfer Protocol), this is same way a  user log via ssh. We can use Bitvise, Filezilla, etc.

Assume database ‘dbuser’ has been created and MySQL dumpfile (dbuser.sql) has been uploaded to user home folder, user log in to terminal and in home directory position.

#ls -la
dbuser.sql

Import: To MySQL dump data file to MySQL Server type the following command:

#pwd
/home/user
#mysql -u user -p -h localhost dbuser < dbuser.sql

Export: To Export a database and create dump file from MySQL Server type the following command:

#mysqldump -u [username] -p [database name] > [database name].sql

Setup Nginx Virtual Host on CentOS 6

Assume NGINX MySQL PHP (LEMP) has been success installed on CentOS 6, for tutorial how to install visit here

Create a New Directory for web files
The first step in creating a virtual host is to a create a directory where we will keep the new website’s information. This location will be your Document Root in the Apache virtual configuration file later on. By adding a -p to the line of code that allows us to create a folder with a nested folder inside of it

#mkdir -p /var/www/example.com/public_html

Grant Ownership Permissions of directory to user (assumed username ‘user’ has been added)

#chown -R user:nginx /var/www/example.com/public_html

Additionally, it is important to make sure that everyone will be able to read our new files.

#chmod 755 /var/www

Create index html page to for test within our configurations directory.

#vi /var/www/example.com/public_html/index.html
<html>
<head>
<title>www.example.com</title>
</head>
<body>
<h1>Success: You Have Set Up a Virtual Host</h1>
</body>
</html>

Turn on Nginx Virtual Host
To setup nginx virtual host, we will need to open up nginx virtual file located at /etc/nginx/conf.d/virtual.conf and you will need to update it with the following configuration

#vi /etc/nginx/conf.d/virtual.conf
server {
listen 80;
server_name example.com www.example.com;
root /var/www/example.com/public_html;
index index.php;
location / {
try_files $uri $uri/ /index.php?$query_string;
}
# Logging -- access_log /var/www/example.com/public_html/access.log; error_log /var/www/example.com/public_html/error.log; # serve static files directly location ~* ^.+.(jpg|jpeg|gif|css|png|js|ico|html|xml|txt)$ { access_log off; expires max; } }

Restart nginx and php-fpm service

#service nginx restart

Setting Up the Local Hosts
If you have pointed your domain name to your virtual private server’s IP address you can skip this step. You do not need to set up local hosts. Your virtual hosts should work. However, if want to try out your new virtual hosts without having to connect to an actual domain name, you can set up local hosts on your computer alone.

#vi /etc/hosts
# Host Database
# localhost is used to configure the loopback interface
# when the system is booting. Do not change this entry.
##
127.0.0.1 localhost
#Virtual Hosts
12.34.56.789 www.example.com

Test if nginx virtual host has been working by access this at browser http://example.com

Enable PHP
To enable PHP please add following line to /etc/nginx/conf.d/virtual.conf

#vi /etc/nginx/conf.d/virtual.conf
    # pass the PHP scripts to FastCGI server listening on 127.0.0.1:9000
    #
    location ~ \.php$ {
        root           /var/www/example.com/public_html;
        fastcgi_pass   127.0.0.1:9000;
        fastcgi_index  index.php;
        fastcgi_param  SCRIPT_FILENAME   $document_root$fastcgi_script_name;
        include        fastcgi_params;
    }

CHECK RESULTS:
Create a php info page and add in the following line:

#vi /var/www/example.com/public_html/info.php
<?php
phpinfo();
?>

Then Save and Exit.
Restart nginx and php-fpm service again so that all of the changes take effect:

#service nginx restart
#service php-fpm restart

Test if php working by access this at browser http://example.com/info.php

Install NGINX MySQL PHP (LEMP) on CentOS 6

To avoid any conflict once NGINX service start please make sure Apache service already removed (if available). We can remove Apache service as follow
Shutdown Apache service (if running)

#service httpd stop

Remove Apache from the boot cycle, so that it does not start up again on server boot

#chkconfig httpd off

Remove Apache package

#yum remove httpd

STEP ONE: UPDATE EPEL REPOSITORY

NGINX is available as a package for CentOS 6 from epel repository but first we should update epel repository, which we can install as follows:

#yum install epel-release

STEP TWO: INSTALL MYSQL

MySQL is a powerful database management system used for organizing and retrieving data on a virtual server. To install MySQL, open terminal and type in these commands:

#yum install mysql-server
#service mysql start

During the installation, MySQL will ask you for your permission twice. After you say Yes to both, MySQL will install. Once it is done installing, you can set a root MySQL password:

#/usr/bin/mysql_secure_installation

The prompt will ask you for your current root password. Since you just installed MySQL, you most likely won’t have one, so leave it blank by pressing enter.

Enter current password for root (enter for none):
OK, successfully used password, moving on...
Setting the root password ensures that nobody can log into the MySQL
root user without the proper authorisation.
Set root password? [Y/n]
New password:
Re-enter new password:
Password updated successfully!
Reloading privilege tables..
 ... Success!
Remove anonymous users? [Y/n] y
 ... Success!
Remove test database and access to it? [Y/n] y
 - Dropping test database...
 ... Success!
 - Removing privileges on test database...
 ... Success!
Reload privilege tables now? [Y/n] y
 ... Success!
Cleaning up...
All done!  If you've completed all of the above steps, your MySQL
installation should now be secure.
Thanks for using MySQL!

Set the processes to run automatically when server boots

#chkconfig mysql on

STEP THREE: INSTALL NGINX

Nginx install using yum

#yum install nginx

To get NGINX running type:

#/etc/init.d/nginx start

We can check that nginx has installed by open a browser and type http://ipaddressNGINX-success-installed
Configure the server to start NGINX on server boot

#chkconfig nginx on

STEP FOUR: INSTALL PHP
The php-fpm package is located within the REMI repository, which, at this point, is disabled. The first thing we need to do is enable the REMI repository and install php and php-fpm:

#wget http://rpms.famillecollet.com/enterprise/remi-release-6.rpm
#rpm -Uvh remi-release-6.rpm

Enable REMI repository by edit file remi.repo.
Find the line enabled =0 and change all of it to 1 to enable REMI repository.

#vi /etc/yum.repos.d/remi.repo
[...]
enabled=1
[...]

Then we can install php and php-fpm as follows:

#yum install php-fpm php-mysql

Set the php-fpm processes to run automatically when server boots

#service php-fpm start
#chkconfig php-fpm on

STEP FIVE: CONFIGURE PHP
We need to make one small change in the php.ini configuration.
Find the line, cgi.fix_pathinfo=1, and change the 1 to 0

#vi /etc/php.ini
cgi.fix_pathinfo=0

If this number is kept as a 1, the php interpreter will do its best to process the file that is as near to the requested file as possible. This is a possible security risk. If this number is set to 0, conversely, the interpreter will only process the exact file path a much safer alternative. Save and Exit.

STEP SIX: CONFIGURE NGINX
Open up the default nginx config file and raise the number of worker processes to 4 then save and exit that file.

#vi /etc/nginx/nginx.conf
[...]
worker_processes  4;
[...]

Nginx already comes with a default configuration to use php fpm. Open the /etc/nginx/conf.d/default.conf file and look following lines.

#vi /etc/nginx/conf.d/default.conf
# The default server
server {
    listen       80;
    server_name example.com;
 
    location / {
        root   /usr/share/nginx/html;
        index index.php  index.html index.htm;
    }
 
    error_page  404              /404.html;
    location = /404.html {
        root   /usr/share/nginx/html;
    }

    error_page   500 502 503 504  /50x.html;
    location = /50x.html {
        root   /usr/share/nginx/html;
    }

    # pass the PHP scripts to FastCGI server listening on 127.0.0.1:9000
    #
    location ~ \.php$ {
        root           /usr/share/nginx/html;
        fastcgi_pass   127.0.0.1:9000;
        fastcgi_index  index.php;
        fastcgi_param  SCRIPT_FILENAME   $document_root$fastcgi_script_name;
        include        fastcgi_params;
    }
}

Here are the details of the changes:

  • Add index.php within the index line.
  • Change the server_name to your domain name or IP address (replace the example.com in the configuration)
  • Change the root to /usr/share/nginx/html;
  • Uncomment the section beginning with “location ~ \.php$ {“,
  • Change the root to access the actual document root, /usr/share/nginx/html;
  • Change the fastcgi_param line to help the PHP interpreter find the PHP script that we stored in the document root home.
  • Save and Exit

Open up the php-fpm configuration, replace the apache in the user and group with nginx:

#vi /etc/php-fpm.d/www.conf
; RPM: apache Choosed to be able to access some dir as httpd
user = nginx
; RPM: Keep a group allowed to write in log dir.
group = nginx

Finish by restarting php-fpm.

#service php-fpm restart

CHECK RESULTS:
Create a php info page and add in the following line:

#vi /usr/share/nginx/html/info.php
<?php
phpinfo();
?>

Then Save and Exit.
Restart nginx so that all of the changes take effect:

#service nginx restart

We can check that NGINX MySQL PHP has installed successfully by open a browser and type http://ipaddress/info.php

Set Up nginx, mysqld, php-fpm Autostart

#chkconfig --levels 235 mysql on
#chkconfig --levels 235 nginx on
#chkconfig --levels 235 php-fpm on

Create mySQL User Grant PRIVILEGES to Database

Connect to mySQL server as root from console by type

[root@vpshelpdesk]#mysql -u root -p
Connect-to-mySQL-server-as-root-from-console

Create a mySQL database from console by type this

mysql>CREATE DATABASE dbuser;
create-database-mySQL

mysql>CREATE USER 'user'@'localhost' IDENTIFIED BY 'password';
mysql>GRANT ALL PRIVILEGES ON dbuser.* TO 'user'@'localhost' WITH GRANT OPTION;
mysql>CREATE USER 'user'@'%' IDENTIFIED BY 'password';
mysql>GRANT ALL PRIVILEGES ON dbuser.* TO 'user'@'%' WITH GRANT OPTION;
mysql>FLUSH PRIVILEGES;
mysql>SHOW GRANTS FOR 'user'@'localhost';
SHOW-GRANTS-FOR-user-localhost
Displaying list of users, use the SELECT USER statement
mysql>SELECT USER FROM mysql.user;

To remove an account, use the DROP USER statement

mysql>DROP USER 'user'@'localhost';

Displaying list of all databases, use the SHOW  DATABASES statement

mysql>show databases;

To remove an database, use the DROP DATABASE statement

mysql>DROP DATABASE dbuser;