To avoid any conflict once NGINX service start please make sure Apache service already removed (if available). We can remove Apache service as follow
Shutdown Apache service (if running)
#service httpd stop
Remove Apache from the boot cycle, so that it does not start up again on server boot
#chkconfig httpd off
Remove Apache package
#yum remove httpd
STEP ONE: UPDATE EPEL REPOSITORY
NGINX is available as a package for CentOS 6 from epel repository but first we should update epel repository, which we can install as follows:
#yum install epel-release
STEP TWO: INSTALL MYSQL
MySQL is a powerful database management system used for organizing and retrieving data on a virtual server. To install MySQL, open terminal and type in these commands:
#yum install mysql-server
#service mysql start
During the installation, MySQL will ask you for your permission twice. After you say Yes to both, MySQL will install. Once it is done installing, you can set a root MySQL password:
#/usr/bin/mysql_secure_installation
The prompt will ask you for your current root password. Since you just installed MySQL, you most likely won’t have one, so leave it blank by pressing enter.
Enter current password for root (enter for none):
OK, successfully used password, moving on...
Setting the root password ensures that nobody can log into the MySQL
root user without the proper authorisation.
Set root password? [Y/n]
New password:
Re-enter new password:
Password updated successfully!
Reloading privilege tables..
 ... Success!
Remove anonymous users? [Y/n] y
 ... Success!
Remove test database and access to it? [Y/n] y
 - Dropping test database...
 ... Success!
 - Removing privileges on test database...
 ... Success!
Reload privilege tables now? [Y/n] y
 ... Success!
Cleaning up...
All done!  If you've completed all of the above steps, your MySQL
installation should now be secure.
Thanks for using MySQL!
Set the processes to run automatically when server boots
#chkconfig mysql on
STEP THREE: INSTALL NGINX
Nginx install using yum
#yum install nginx
To get NGINX running type:
#/etc/init.d/nginx start
We can check that nginx has installed by open a browser and type http://ipaddress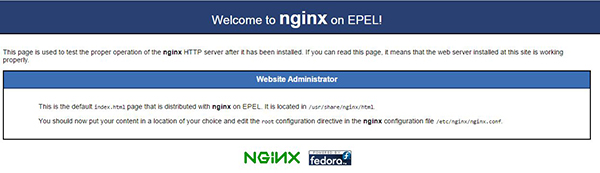
Configure the server to start NGINX on server boot
#chkconfig nginx on
STEP FOUR: INSTALL PHP
The php-fpm package is located within the REMI repository, which, at this point, is disabled. The first thing we need to do is enable the REMI repository and install php and php-fpm:
#wget http://rpms.famillecollet.com/enterprise/remi-release-6.rpm
#rpm -Uvh remi-release-6.rpm
Enable REMI repository by edit file remi.repo.
Find the line enabled =0 and change all of it to 1 to enable REMI repository.
#vi /etc/yum.repos.d/remi.repo
[...]
enabled=1
[...]
Then we can install php and php-fpm as follows:
#yum install php-fpm php-mysql
Set the php-fpm processes to run automatically when server boots
#service php-fpm start
#chkconfig php-fpm on
STEP FIVE: CONFIGURE PHP
We need to make one small change in the php.ini configuration.
Find the line, cgi.fix_pathinfo=1, and change the 1 to 0
#vi /etc/php.ini
cgi.fix_pathinfo=0
If this number is kept as a 1, the php interpreter will do its best to process the file that is as near to the requested file as possible. This is a possible security risk. If this number is set to 0, conversely, the interpreter will only process the exact file path a much safer alternative. Save and Exit.
STEP SIX: CONFIGURE NGINX
Open up the default nginx config file and raise the number of worker processes to 4 then save and exit that file.
#vi /etc/nginx/nginx.conf
[...]
worker_processes  4;
[...]
Nginx already comes with a default configuration to use php fpm. Open the /etc/nginx/conf.d/default.conf file and look following lines.
#vi /etc/nginx/conf.d/default.conf
# The default server
server {
    listen       80;
    server_name example.com;

    location / {
        root   /usr/share/nginx/html;
        index index.php  index.html index.htm;
    }

    error_page  404              /404.html;
    location = /404.html {
        root   /usr/share/nginx/html;
    }

    error_page   500 502 503 504  /50x.html;
    location = /50x.html {
        root   /usr/share/nginx/html;
    }

    # pass the PHP scripts to FastCGI server listening on 127.0.0.1:9000
    #
    location ~ \.php$ {
        root           /usr/share/nginx/html;
        fastcgi_pass   127.0.0.1:9000;
        fastcgi_index  index.php;
        fastcgi_param  SCRIPT_FILENAME   $document_root$fastcgi_script_name;
        include        fastcgi_params;
    }
}
Here are the details of the changes:
- Add index.php within the index line.
- Change the server_name to your domain name or IP address (replace the example.com in the configuration)
- Change the root to /usr/share/nginx/html;
- Uncomment the section beginning with “location ~ \.php$ {“,
- Change the root to access the actual document root, /usr/share/nginx/html;
- Change the fastcgi_param line to help the PHP interpreter find the PHP script that we stored in the document root home.
- Save and Exit
Open up the php-fpm configuration, replace the apache in the user and group with nginx:
#vi /etc/php-fpm.d/www.conf
; RPM: apache Choosed to be able to access some dir as httpd
user = nginx
; RPM: Keep a group allowed to write in log dir.
group = nginx
Finish by restarting php-fpm.
#service php-fpm restart
CHECK RESULTS:
Create a php info page and add in the following line:
#vi /usr/share/nginx/html/info.php
<?php
phpinfo();
?>
Then Save and Exit.
Restart nginx so that all of the changes take effect:
#service nginx restart
We can check that NGINX MySQL PHP has installed successfully by open a browser and type http://ipaddress/info.php
Set Up nginx, mysqld, php-fpm Autostart
#chkconfig --levels 235 mysql on
#chkconfig --levels 235 nginx on
#chkconfig --levels 235 php-fpm on